I’m happy and grateful you’ve decided to set up a Facebook page for your farm. You’ve made a powerful decision to engage our urban consumers who want to know a farmer and know more about how you make their favorite dairy products.
First, let’s make sure you don’t already have a Facebook page about your farm. Even if you haven’t set up a Facebook page or aren’t even on Facebook, the platform may have created an unofficial community page based on your farm and location.
Use Facebook’s search function to see if your farm already exists on Facebook. (You’ll need to be logged into Facebook to do a search.)
Why would Facebook create a community page for your farm?
Facebook creates unofficial community pages if people who have visited your farm have tried to check in or have posted pictures about your farm. Facebook wants that information to be organized so other users can find it.
You can get control of the Facebook page.
Community pages allow the business owner to take control if you provide the proper information. Facebook will call you and verify your business number or you can provide a utility bill with your address or LLC number. Once you have control, you can use it as your farm’s Facebook page.
If you’ve done a search and can’t find anything about your farm, then let’s create an official Facebook farm page.
1. You will need a Facebook personal profile to control a page, so create one if you don’t have one. Please DO NOT use a fake name or the farm name to create your profile. Facebook tends to delete what it thinks are fake accounts, and I’ve seen businesses lose their profile (and control over the page) because it violated Facebook’s terms of agreement and was deleted.
2. Once you have your Facebook profile logged in, go to Facebook’s Create A Page.
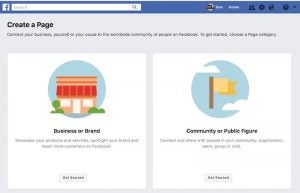
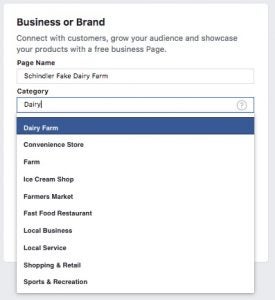
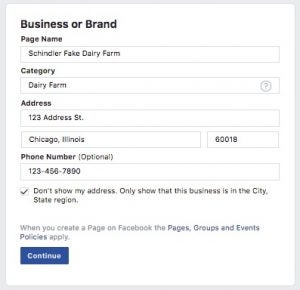
3. Select “Business or Brand” for how you want to set up your page and then choose your category. “Dairy Farm” is a category.
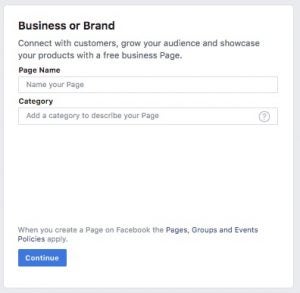
4. Add your farm’s name. This is very important because you can only change it once after you’ve created the page. I recommend that you use the farm’s business name to create the page so it matches what people likely would be searching for.
5. You will need your farm address and some information about the farm to put in the “about” section. If you don’t want to include your location, you don’t have to. But, it’s likely Google already has your farm address included online.
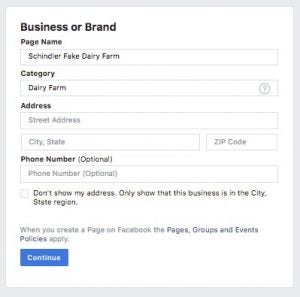
You may think you are hiding the farm if you don’t include your address, but it’s difficult to escape the Internet and the information that is being collected about your farm. If it were me, I would rather this information be correct and in my control. If you don’t want to put your address in, then just check the box so it’s not seen.
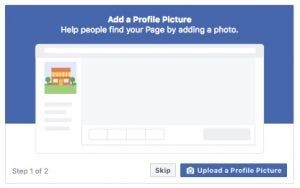
6. You will need a few digital items to set up the Facebook page, such as your logo (you can take a picture of your logo if you don’t have a digital copy — you can always change it later). This is also the image that people will see the most. It needs to be a JPG or GIF and will be reduced significantly on mobile, so don’t make it too complicated or just use a cow image.
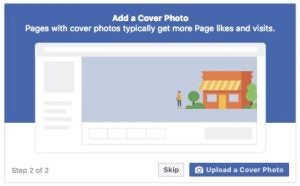
You will also need a cover photo for the Facebook farm page and it will need to be large — at least 1,280 pixels across. Or, a big photo off your phone or camera will work.
That’s it. You are now active on Facebook and you can begin sharing your farm’s story and engage directly with consumers and other agriculture advocates.
I would love to know when you get online, so if you want to drop me a link to your Facebook farm page, I’ll be happy to help promote it and the photos and videos you share.
Do you know what you should be sharing on Facebook? Here’s my Top 10 list of what to share on Facebook.
Good luck advocating for dairy and if you ever need help, contact me at don.schindler@dairy.org or your local dairy checkoff. We are there to help whenever you need it.


